How to Select, Install, and Maintain Heavy-Duty Commercial Truck Bumpers
Work trucks, fleet vehicles, and off-road utility rigs face harsh conditions every day. From navigating active construction sites and remote agricultural land to hauling heavy loads on the highway, front and rear vehicle protection is critical. Standard factory plastic or thin sheet-metal bumpers often fail to protect vital engine components, cooling systems, and frame rails from animal strikes, jobsite debris, or low-speed impacts. Upgrading to a heavy-duty aftermarket bumper significantly improves vehicle protection, increases winch and recovery options, and preserves overall truck longevity.
Selecting the right replacement bumper requires evaluating structural material strength, vehicle payload limits, mounting points, and compatibility with factory safety sensors. When analyzing heavy-duty front replacement options, grille guard integrations, and rear step bumper configurations, reviewing technical specifications like those detailing heavy-duty bumpers by Iron Ox Products provides a clear benchmark for comparing steel gauges, mounting brackets, and finish options across commercial vehicle applications. Taking time to establish your specific protection requirements ensures your truck upgrade delivers maximum durability without compromising safety or handling.
Step 1: Evaluating Bumper Styles and Protection Levels
Different operational environments call for distinct levels of front and rear protection. Understanding the structural variations helps match the bumper design to your daily work demands.
Base Replacement Bumpers
Base aftermarket bumpers replace the stock plastic cover with a solid steel shell while keeping a low profile.
- Key Advantages: Offers substantially higher impact resistance than factory bumpers without adding excessive front-end weight or altering vehicle length significantly.
- Best Used For: Standard commercial fleets, light service vehicles, and daily work trucks needing basic impact defense against highway debris and parking lot bumps.
Full-Grille Guard Bumpers
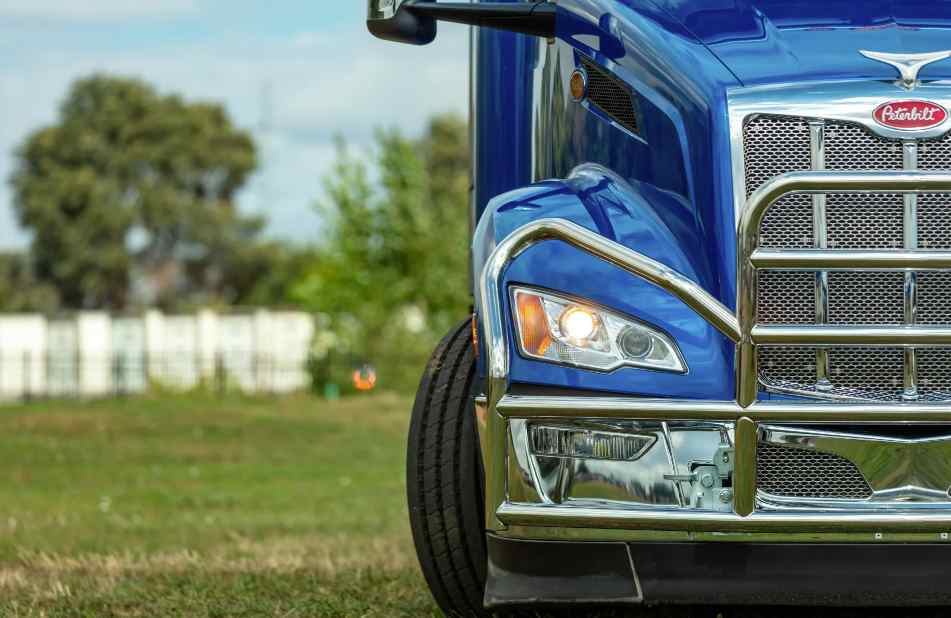
Full-protection bumpers combine a heavy-duty lower bumper shell with integrated tubular steel uprights and wrap-around headlight guards.
- Key Advantages: Shields the entire front fascia, including the radiator, intercooler, headlights, and front fenders from major impacts such as animal strikes or falling jobsite material.
- Best Used For: Rural service trucks, agricultural vehicles, long-haul utility fleets, and trucks operating in high-wildlife areas.
Heavy-Duty Rear Step Bumpers
Rear replacement bumpers provide a stable stepping surface while protecting the truck bed and tailgate during reversing maneuvers.
- Key Advantages: Includes reinforced hitch receiver cutouts, heavy-duty shackle mounts, and anti-slip tread plates for safer truck bed access.
- Best Used For: Towing vehicles, delivery trucks, and service rigs that require frequent rear load access.
Step 2: Understanding Material Options and Coating Finishes
The strength, weight, and corrosion resistance of a heavy-duty bumper depend directly on the steel thickness and surface treatment applied during manufacturing.
Steel Thickness and Gauge Ratings
- 3/16-Inch Plate Steel: The industry standard for heavy-duty bumper shells. It offers an ideal balance of high structural strength and manageable weight.
- 1/4-Inch Structural Steel: Used for internal mounting brackets, frame attachment plates, and winch mounts where maximum load distribution and pull strength are required.
- Tubular Steel Size: Look for schedule 40 or 2-inch outer diameter piping on grille guard uprights to prevent tubing from crushing or twisting upon impact.
Protective Surface Finishes
Unprotected raw steel will rust rapidly when exposed to rain, road salt, and UV radiation.
- Textured Powder Coating: Provides a thick, durable barrier against chips, scratches, and chemical exposure. The textured finish also hides minor scuffs caused by jobsite debris.
- E-Coat Primer Base: High-quality bumpers apply an electro-deposition primer coat before the top powder layer to ensure long-term corrosion prevention even if the outer coating chips.
Step 3: Checking Compatibility with Vehicle Sensors and Airbags
Modern trucks come equipped with complex driver-assist systems and safety sensors integrated into the front and rear bumpers. Replacing stock bumpers requires careful verification to maintain factory safety functions.
Parking Sensors and Blind-Spot Monitors
- Sensor Cutouts: Ensure the aftermarket bumper features pre-drilled mounting locations designed for your specific truck make and model year.
- Sensor Calibration: After installing the bumper, test all proximity sensors and blind-spot monitoring systems to confirm they retain their proper field of view and operate without false alerts.
Adaptive Cruise Control and Crash Sensors
- Radar Module Relocation: Many modern trucks house adaptive cruise control radar units behind the front grille. Choose a bumper design that includes relocation brackets or cutout panels to keep the radar unobstructed.
- Airbag Compatibility: Quality aftermarket bumpers are engineered to transfer impact force directly to the frame rails without interfering with the internal crash sensors that deploy vehicle airbags.
Step 4: Installation Steps and Suspension Considerations
Proper installation ensures the bumper remains securely attached to the truck frame during an impact or heavy winch recovery operation.
Evaluating Front-End Weight Distribution
Adding a 150-to-250-pound steel bumper onto the front axle alters vehicle dynamics.
- Suspension Sag: Measure front ride height before and after installation. If the front end sags significantly, consider upgrading to heavy-duty front coil springs or leveling kits to restore alignment and suspension travel.
- Tire Clearance: Check steering clearance at full lock to ensure larger tires do not rub against the edges of the new bumper shell.
Secure Frame-Mounting Protocols
- Direct Frame Attachment: Always bolt heavy-duty bumpers directly to the truck’s main frame rails using high-strength Grade 8 hardware. Never rely on body mounts or thin sheet-metal crossmembers.
- Torque Specifications: Use a calibrated torque wrench to tighten all mounting bolts to the manufacturer’s specified ft-lb rating to prevent hardware from loosening due to engine and road vibration.
Step 5: Routine Bumper Maintenance and Inspection
Maintaining an aftermarket steel bumper requires periodic visual checks and surface touch-ups to ensure long-term performance.
- Inspect Hardware Every 5,000 Miles: Check frame-mounting bolts, winch plates, and shackle mounts during routine oil changes to confirm all fasteners remain tight.
- Address Coating Chips Immediately: Clean and touch up any paint chips or scratches using a rust-inhibiting touch-up paint to prevent moisture from creeping beneath the powder coat.
- Clean Road Salts Promptly: Wash the underside and mounting brackets of the bumper after driving on salted winter roads or muddy off-road trails to prevent localized corrosion.
Summary Checklist for Heavy-Duty Bumper Selection
- [ ] Define Protection Needs: Choose between base replacement, full-grille guard, or rear step bumpers based on your operational environment.
- [ ] Verify Steel and Coating Quality: Select 3/16-inch plate steel with a multi-stage powder coat finish for maximum durability.
- [ ] Confirm Sensor Integration: Ensure the bumper includes pre-cut ports for parking sensors, cameras, and adaptive cruise control radar.
- [ ] Check Weight and Suspension: Account for front-end weight additions and adjust spring rates if necessary to maintain proper ride height.
- [ ] Mount Directly to Frame Rails: Use Grade 8 hardware and proper torque settings during installation.
- [ ] Maintain Surface Coatings: Wash off corrosive road salts regularly and touch up paint chips promptly to block rust formation.